

Apartment residents can create personalized entry codes on their phones
in advance for visitors. This way, visitors can enter without the resident being there, and they won't have to wait downstairs.
During the signup process, the user (apartment resident) will provide their intercom open code to SnapEntry.
After signing up, SnapEntry will provide the user with a new intercom phone number, which they can then share with the concierge as their updated contact information.
With the provided intercom open code, SnapEntry will unlock your intercom on your behalf, when a buzz is made.
The visitor will let SnapEntry know that they've arrived at the apartment by pressing a button
The visitor will buzz the resident, which will call snap entry and open the door for the next 2 minutes.
How will this work?
What does this look like for the visitor?
SnapEntry will become your assistant by taking calls from your intercom for you.
Apartment Resident
User Entering the Apartment
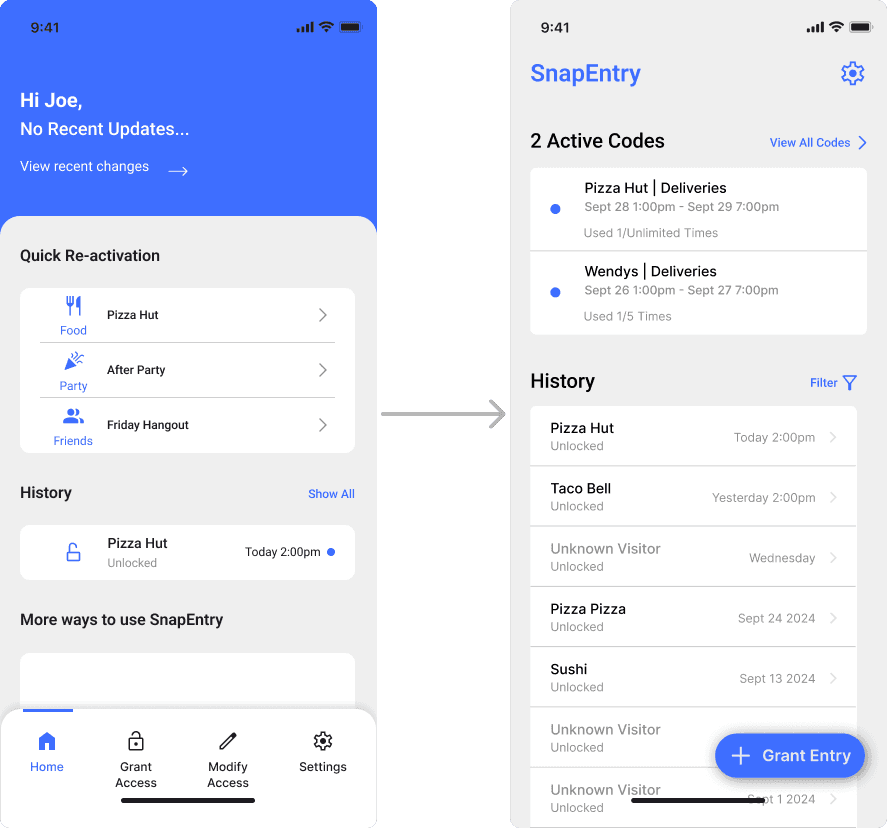
The home screen displays the number of active codes, a history list, and a "Grant Entry" button. Users begin by generating a new code through the floating action bar.

Users can select a visitor type to generate personalized entry code settings automatically, then add a label to their code.
02
Select the type of visitor

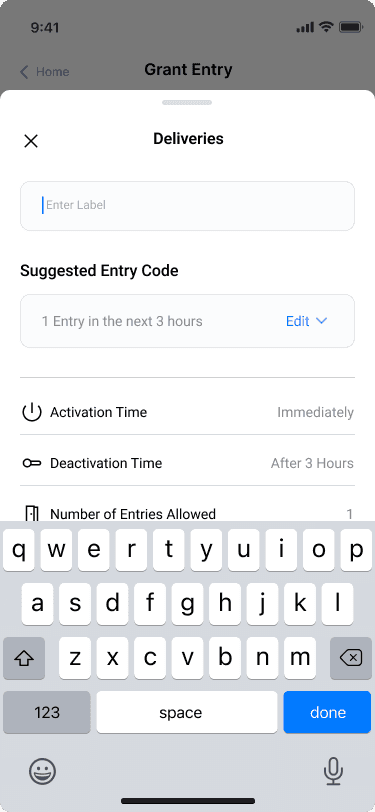
Once a code is generated, users can review the four basic settings and have the option to edit them. After completing the review, they can press confirm to finalize and generate the code.
03
Review the entry options


Users can copy the code message to send to their visitor, providing clear instructions on how to access the apartment.
04
Give this code to your visitor


Managing Multiple Input Fields Without Overwhelming Users
SnapEntry requires users to input a significant amount of information, including intercom phone number, intercom open code, email and phone number verification, and other basic user information. This resulted in a long sign up process and risks overwhelming the users with too many fields, leading to poor user experience.
Solution:
Implemented a step-by-step approach where users are guided through the process with more visual hierarchy. We integrated visuals and clear labels to explain why each piece of information is needed to reduce user anxiety and gain trust.
a very long sign up process
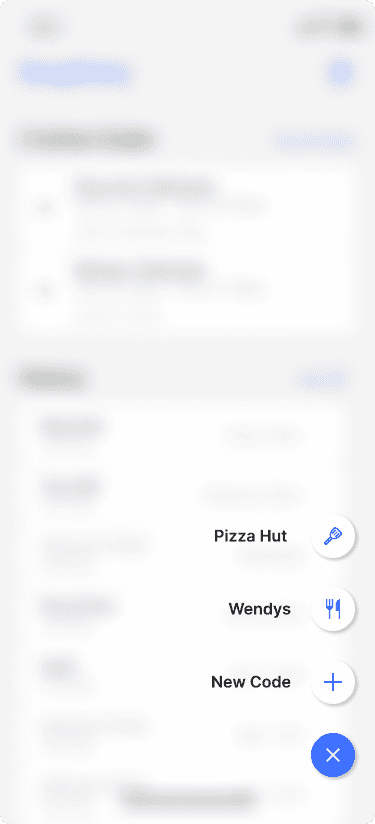
Improving the User Flow with a Floating Action Bar
During user testings, we observed that users often clicked on the navigation bar when they were uncertain about the next step in the user flow. This disrupted the flow and made it difficult for them to complete their desired task.
Solution:The floating action bar (FAB) only appears on the home screen. When users click on the FAB, they are presented with the following options: “New” (to generate a new code) and “Recent Codes” (a list of their recent codes for reactivation). We also relocated the settings function to the top right corner of the home screen, making it accessible only from there. This decision not only frees up vertical space on all pages, but also guides the users better through the flow, allowing them to only focus on one task at a time.
Challenges found

The most significant challenge for this product was the user testing process, as the concept itself was quite unfamiliar to many users. It required extra effort to explain the product's purpose and guide users through interactions that felt intuitive to me but were new to them. Despite this, the process taught me how essential clear communication and iterative testing are for refining a product's usability.
On the creative side, I truly enjoyed the experience, as I was the only designer on the team. This gave me the creative freedom to shape its entire visual direction, from the color scheme to the interaction flow. It was both a fun and rewarding challenge to ensure that the visuals were not only aesthetically pleasing but also intuitive and user-friendly.